Need help ?Address: FLAT/RM 803 CHEVALIER HOUSE 45-51 CHATHAM ROAD SOUTH TSIM SHA TSUI KL
Email: support@hkmlc.com

In this article, I'm going to tell you everything that you need to know about the HKMLC 55" Essential Smartboard. I'm going to go over all of its features, I'm going to do some demos to show you how it actually works, and by the end of this video, you'll know whether or not the Smartboard is right for you. And I'm also going to give you some reasons why you might want to choose a Smartboard over a regular TV for your home or office.
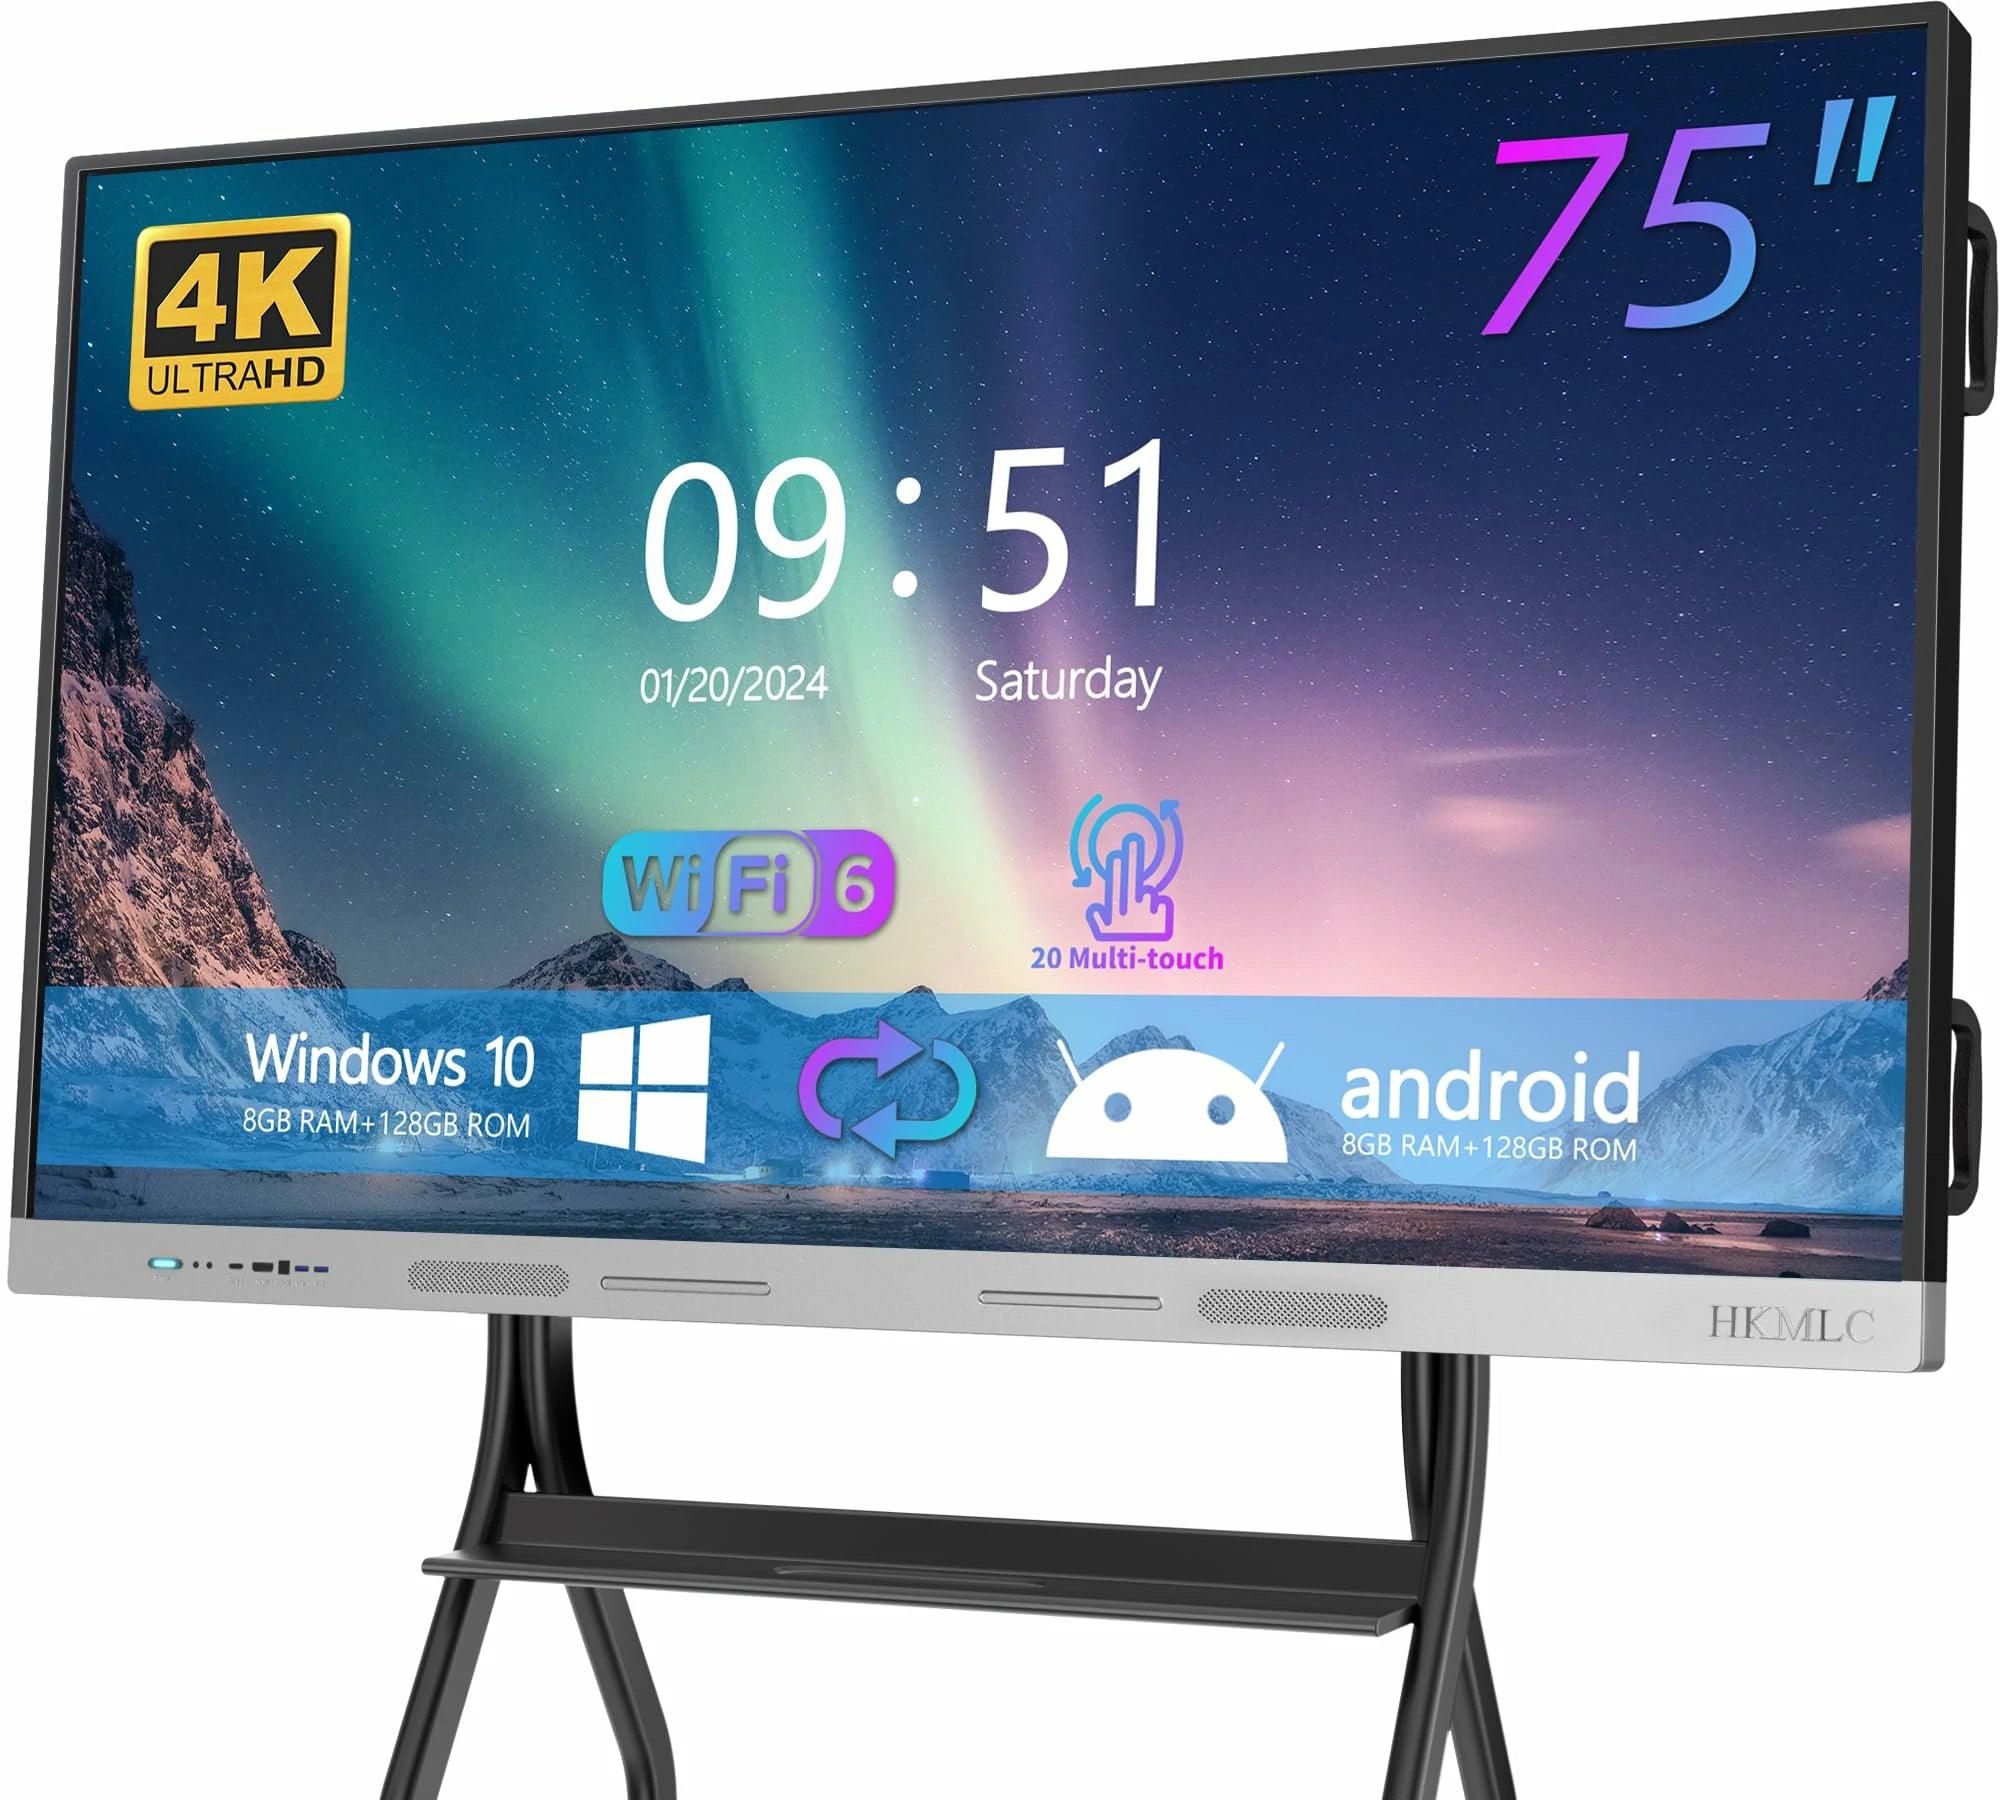
Now, some of the highlights of this Smartboard are it's got a 4K Ultra High defin display, it's got stereo speakers on the front of the display so you don't have to go and hook up any audio system to get sound, it's got 20 points of touch so you can have multiple people writing on the Smartboard all at once, it's got annotation support, it's also made with a metal frame and an explosion-proof tempered glass, and it's also got fairly slim bezels.

Now let's go over some of the specs really quick. The display is anti-glare and LED back lit, it's got 400 nits of brightness with a 5,000 to 1 contrast ratio. It's running Android 11 with a cortex A55 CPU, 4 gigs of RAM and a 32 GB SSD for storage, and it's also got an 8 millisecond response time so you can use it for some regular gaming.

Now, as far as setting the Smartboard up, it does weigh 65 lbs so it's a little bit heavy for just one person to actually take out of the box and set up. So I definitely recommend getting at least two people. And along with the 55 in screen, you also get a wall mounting bracket, you get four Wi-Fi antennas, two stylus pens, a remote control and your instruction booklet.

So here we have our power button, which can put the screen to sleep if you simply press on it. We also have our USB type-c port and HDMI, we have an option to connect a touch device and us two USB 3.0 on the side of the screen. We have a dedicated power button so you can turn the screen off if you don't want any power to go to it. We have our Wi-Fi antenna, we have a mic port in, we have an RS232, we have an optical out and VGA port in and a PC audio output. And on the bottom of the screen we have our RJ45 in for our ethernet, we have a line out, we also have another touch control, we've got two more HDMI ports, a USB 2.0 and a USB 3.0 and our other Wi-Fi antennas.

Now as you saw, the Smartboard does come with a wall mount, or you can also opt to buy the optional stand which I have here. It's super sturdy, it also has rollers so you can very easily move it around and it's also got this little shelf here that you can use to uh put things like markers and things like that. I actually prefer the stand because it's not so permanent and if you're in your home and office or a classroom and you want to move the Smartboard somewhere else, you can very easily move it around and you don't have to worry about putting holes in your wall.
Now some of the reasons why you might want to consider getting a Smartboard over a regular TV is one, you don't need any PC to actually display anything on the Smartboard. Everything's already built in and you have access to a ton of different apps. So whether you're going to use this to display pictures uh you need Word documents to watch something on YouTube or even go to a web browser, again, you don't need any extra parts like a PC everything's just already built in. Another reason is the interactive capability so not only does it act as a TV, but you can also you know jot down some ideas leave notes for family members, co-workers and when you're done there's nothing to clean up just like a regular Smartboard and you don't have to worry about those permanent marks that those erasable markers sometimes leave. And if you have kids or you're in a classroom, it's really nice for kids to have a huge screen to actually interact with versus having a small 10in tablet or something like that. Another really huge feature about the Smartboard versus a regular TV is if you have kids or you work with kids in a classroom you don't have to worry about the kids coming up banging on the screen anything like that and it getting damaged like a regular TV screen would.

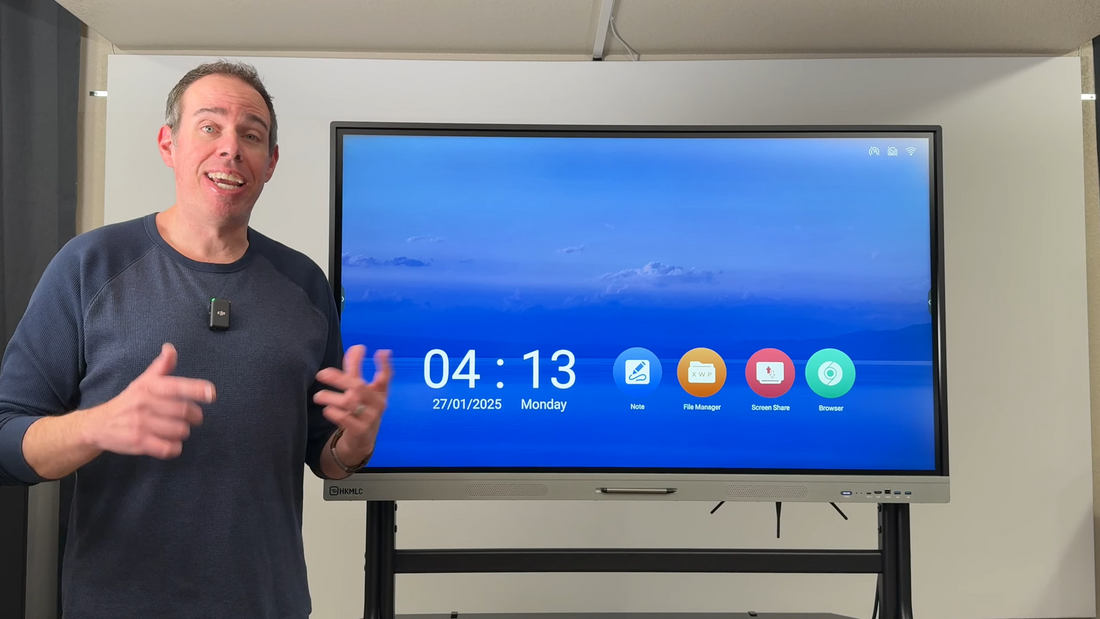
So now let's go into how the Smartboard actually works. So when you first turn it on you're going to see a screen somewhat similar to this you can customize it a little bit uh but for whatever these little four icons are here you're not going to be able to customize them how you want or put custom icons and applications on the screen what's here is pretty much going to be there so we have our note our file manager screen share and our browser up at the top right hand corner here we do have our Wi-Fi it's got Wi-Fi 6 built in we have our wired land capability and also a hotspot on each one of the sides of the on each side of the Smartboard we do have these little bars here that come out if you simply tap on them we've got a back button home button recent applications we've got some applications that we use recently or frequently you can kind of change those around you can have only a up to three different ones on the side here this is all of your applications we've got our annotate button we also have our settings and we have some more tools that aren't shown on here that we'll go over in just a minute.
Now you can also bring up this little square here that you can move around and this has some uh quick options here that you can also change around our home whiteboard settings annotation recent tasks and the back button and if you want to collapse that it simply collapses by itself and then after a few more seconds it'll actually disappear but if you want to show that again you just simply tap and hold two fingers on the screen and it opens up that little box and then you can kind of again move it around wherever you need.

Now if we swipe over to the right here it shows a kind of like a welcome screen so if you have this in a classroom or a conference room you can kind of have you know a little saying or something like it says uh welcome you know we're so glad you're here you can put whatever you want on here uh and that's just to kind of invite people into your room or whatever it doesn't really do much more than that you can add some music uh there's also some templates and you can insert uh some text images and some video that could be playing uh in the background but that's pretty much all that this portion of the screen does.

Now let's take a look at some of the settings really quick there's actually two different uh types of settings we've got quick settings and then there are the setting settings and the quick settings are right here in the sidebar if you take a look you can easily switch between the Android system the hdmis the USB type-c and the VGA just by simply uh tapping on one it'll change the input really quickly we also have our volume down at the bottom here we also have our brightness which I have up all the way we also have our ey care which turns on a blue light filter we also have some audio settings here you can change the volume based treble balance we can turn on our mute we've got some presets here you can go in and change your uh Auto Bright brightness we can also save some energy with that our display settings here the brightness contrast to you and sharpness this is uh you can change this when you have things plugged in uh to the display itself right now everything is is already set and you cannot change that but you can change the color temperature I typically like standard and we've also got some adjustments here again that you can't change I I believe unless you hook something else up to the screen.

Now let's go into our regular settings so here you have your ethernet Wi-Fi your hotspot and your Bluetooth for personal you can change the wallpaper you you have screen saver changes you can set a a lock password for the screen we've got that floating tool that I showed you you can move all around uh you can also make the screen go to sleep just by putting five fingers on the screen just like this then to wake it up it do do the same thing and for the wallpaper again you've got some Styles and here you can do a custom wallpaper for a screen saver you've got some other options here for the input and output you can turn on and off the Touch sounds you can set your output sound right now I'm going to the speakers but we have the line out as as well we've got our mic mixer we also have our USB lock to where you can use a USB key that when you plug it in it locks the screen and you won't be able to use the screen again unless you plug that USB back in and that's good if you have children around and you don't want them to use the screen we also have our microphone that we can choose here so you can also uh plug in a USB camera that's got a microphone or just plug in a microphone and this is good if you want to do some Zoom calls I'll show you how that works in just a minute you can also change the input names so if you have something typically plugged into HDMI 1 you can change it from HDMI 1 to whatever you want then for our system we've got the date and time adjustment language and keyboard a region you can put in your email we also have some startup and shutdown options here one is you can have it start up to certain channel on the hdmis that you always use or the VGA USB type-c or you can just have it go to Android we also have a power off reminder we have a boot task which you can set to start up at a certain time and also shut off at a certain time we've got some dorcy options uh screen protection you can have a display a clock colors or screen saver to save the screen from possibly getting burned in if you leave it on something for a very long time and then we also have our about as you can see we are running the Android version 11.

So now let me show you the main feature of this Smartboard and that is the Whiteboard function. We got our little stylist here that does have two sides. We've got a thicker side that's kind of like a marker and a thinner side that kind of acts as like a pen. So here over on the menu we've got quite a few different options we've got the option of making a new board we can open one that we've saved we can save one save as we can import export we've got send whatever we have in the screen to a cloud storage we can change our themes which right here I have the classic whiteboard that I'm sure a lot of you have seen uh we've got some other options here if you're a basketball coach it's got the basketball right there or if you're a music a musician we've got the music notes there there's quite a few different options you can change the background you can send it in an email and we also have our different settings here we have our eraser selection multi-finger writing automatic brightness and custom toolbar so you can kind of turn on and off these little things on the bottom here if you need or do not need them. We can also share whatever is on our screen as you can see it's preparing to export all they all they need to do is is to scan the QR code and it'll send whatever is on the Whiteboard to their device. Here we have our list which actually shows some of the past whiteboards that we've used.

So here we have our select option which allows you to select things that were already on the screen you can kind of resize them if you need we've got smart right as you can see it kind of decided that I wanted to say doy and instead of my name we can do a search we can flip it so what the top button does is if you had something drawn on the screen that was behind a lot of other things that you drew over and you want to bring this to the very Forefront you'd hit top and it brings that to the very front of the screen over everything else clone it and we can also delete that but that's if you want to move it around you can also do that as well you can also select the whole thing that you just writ instead of just one we'll delete that we've got our different pen options here we've got a pencil looks like a marker a brush and this kind of makes us like shapes and it kind of uses like learning to actually show things you might have wanted to draw it's it's not going to show everything that you're going to draw but it comes up with some suggestion questions. We also have the different color options here you can make the pen size bigger and smaller if you want and you can also change what each side of the pen does to as well we've got the thicker side here and the pencil side here so you can have those actually do a couple different things so we'll make the bigger side do a blue and then we'll do the smaller side a red so if I use the regular pen as you can see it's writing in red and then if I flip it around it actually does blue so if you need to use two different colors it's a pretty quick way to do it and you can also use your finger as well it's just not going to know you know what side you wanted the colors to be. You can also erase the board with the back of your hand. Here we have our eraser options again you can make the size bigger and smaller if you need we have clean all which erases everything off the board clear all very quick. We also have ruler options uh we have the kind of protractor here which allows you to make you know perfectly aligned angles and then when you're done you just hit the check mark and it actually draws that out for you so you have that perfect 90° angle which is convenient you can also rotate this if you need.

We also have some different shapes here that you can select from. We can do a circle draws out a circle for you you can also change the colors of that as well. We also have some 2D and 3D options so we'll do a little cylinder and then I'll make that 3D cylinder instead of you having to actually draw it out. We also have a partition in case you have like three different things that you want to draw on the screen or if you have three different people wanting to draw on the screen they each have their own section and the nice thing is you cannot draw o over into somebody else's section it only stays in the little section that you have so again you don't have to worry about anybody drawing in somebody else's space it won't go past that little portion once you start drawing inside your space and as you can see on the bottom here they also have their options of different colors and sizes for their pen. We also have a table option so you can make kind of a different tables very quickly just like that and then once you draw them it kind of resizes to make whatever you drew fit inside that one little box that you had so even if you go out of it it'll resize that box to fit whatever you just drew in there. We also have a mind map so you can kind of draw things in here as well and then these boxes will do the same thing as before it'll kind of resize so you can put whatever you had in there make it fit and we'll change our pen to that there and you can see that it kind of notices where what you were trying to to write and it puts it on here and then fixes it so everybody can easily see what you wrote instead of looking at Chicken Scratch. We also have the option for sticky notes you can make it say whatever you want and then it puts it off into the corner of the screen there and you can also change the color if you really want to as well.

We also have our preview option which allows you to move around whatever is on the board very easily and you can also resize it as well just by kind of moving your fingers apart and closer together. We also have our grid here which you can use to write things in it'll kind of adjust its size to whatever you're you're writing here and kind of try to figure out what you were trying to write and again correct it so it looks nice and clean and you can also kind of move that around if you need to as well with the preview and then just uh continue writing on the rest of the screen. We also have our undo and redo options so if you were to write something on the screen that you didn't want there you want to kind of take a step back you can always hit undo or redo put that back. We can add some pages as well in case you want to continue writing on the screen and not have to erase everything it'll save the last page or prior page that you did which we have here and it just adds another one and you can also very quickly go to each page by clicking on the page number and just selecting which one you want. And as I said before this screen can have up to 20 points of touch at the same time so you can have 20 fingers touching the screen and drawing all at the same time while in this particular portion of the Whiteboard so if you have you know 20 fingers you can see how they all WR on the screen at the same time and that's pretty much it for the Whiteboard.

So let's go back to our main home screen we'll click on the file manager and this is good if you have things saved inside the Smartboard or if you actually have a SSD or a hard drive or something connected to the Smartboard and you want to search for files you can also do that as well you use that here. We also have the Cloud Drive option if you're logged into one drive or something like that you can also use that but for this you just simply double click and go into the folders like you would on a PC so if you have you know movies music pictures things like that you can kind of search for those in here.
Now even though the Smartboard only has 32 gigs of storage you can easily hook up a USB flash drive that has all your files on it and you can use your USB type A or USB type c so we'll plug in that drive into the front of the Smartboard and then we'll go into our file manager you'll see that the drive will show up on the left hand side right above the Cloud Drive and then you can very easily just double click on any of the folders you want to go into to see your files. You can also switch to the internal storage or go right back to the external drive you just plugged in.

Then as far as the screen share goes if there's a whole bunch of people in your classroom or a conference room and they want to show you things on their device on this screen they can easily do that with this eshare and it's also very easy to use so all anybody has to do is to take their device open up their camera scan the QR code down at the bottom and it'll open up the application if you already have it installed or it'll take you to the App Store so you can download it then once you're in the application all you need to do is to click on the eshare that you're you're trying to get to you can share your screen we can also show some photos videos documents you can Al use also use the camera of the phone to display on the screen as well but for now let's do our screen share we'll start broadcast and it'll start right on the screen there. So now you can see what's broadcasted on my device and it's also really smooth anything that you show on the screen here will show up right on the Smartboard.
So another really cool feature is you can have multiple people casting at the same time on the Smartboard so here as you can see I'm casting my iPhone and I'm going to cast my iPad at the same time so here as you can see it's now showing what's on my iPad and we also have my iPhone over on other side and you can have up to nine screens showing all at the same time.

And then the browser is just that it's just simply a web browser you can also install Chrome or any other web browser you would want to use if you don't want to use the one that's built in. So it seems to scroll pretty good and you can also easily kind of zoom in you need to with two fingers and it's still nice and clear.

Now again back to the sidebar here again if you want to look at all your recent applications you can hit the recents button you can see all the applications that we've been using you can also close them out just simply by pressing on the little X there and it'll shut it out we have our home button and back button so we can easily go back to the home with the home button here are are some of our applications again that we use frequently and you can change those out by using the all apps button here it'll show all the applications that you have installed and if you want to swap one of these out you just simply hold and remove shortcut then open up the applications again and we'll move one of our new applications over to the side so you can have up to three uh quick applications and then the one all applications button is always there. So there are a couple apps that come pre-installed that you can't get rid of we we've got our browser our Cloud Drive the eshare pro we also have a get stored to get the Play Store for the very first time when you first set this up you can also change out your theme which I did here that I told you about earlier so you've got quite a few different options to choose from and whatever one you want you just hit choose and it'll change to that particular theme we also have our note program which is the Whiteboard we we have our keeper program which easily cleans out uh old applications that you're not using to optimize the memory all you need to do is Click clean memory and it'll automatically close out and shut down applications that you're not using to save on memory we also have an imir operation which is kind of like the eshare uh we have our WPS office which is kind of like Microsoft Office so if you need to look at PDFs things like that you would use the wp office or you can also go to the Play Store and install whatever you want uh I installed YouTube things like that we also have our Zoom.

So now I'm going to show you how to use The annotation and when you'd want to use that is when you want to point something out on on your screen or kind of talk about it you would use this and that's the little pencil button here so I'm going to open up YouTube really quick to kind of give me something on my screen to talk about and then we'll Click The annotation button it'll do a screen grab of the [Music] screen and then you can kind of write on the screen maybe you know point something out like that um you can change your brush as well you can change the size the color to kind of help Point things out you can clean the whole board you can save whatever you did we also have some more options you have finder you can insert things on the screen as well share the screen or send it to the cloud and then you can just simply close it when you're done it works pretty well also having magnetic pens stick to the screen is very convenient because then you don't have to worry about losing your stylus.

Now let me show you those quick options that we have at the bottom here. So here we have a timer it'll just bring up a timer on your screen if you want to countdown for something we've got our stopwatch which puts a little stopwatch window on the screen and then here we have record which basically records the whole screen whatever you're doing it also records sound as well so if we click on that and we say record it'll start a countdown and then we'll kind of go to YouTube grave not pay me or what pause that and then we'll stop the video recording we'll say open finder it'll open where we have the video saved and then we can watch it again video player so there's our home screen here's me opening up the side here going to YouTube there's YouTube and we scroll up and then we'll click on that video nope then we'll open up that video we do get grave not pain me or what so as you can see it did record the sound as well as the video too so that's pretty nice. We also have freeze which basically just freezes the screen that you're on we also have a crop option we can also do split screen so if you want to have say uh your browser open on one side and your finder or keeper open on the other you can do that too you can also make the the screen kind of swap or you close one out and you can only have a Max of two things open at a time so that's that you can also go to your camera to take pictures if you happen to have your camera connected to the Smartboard we also have a poll kit where people can kind of uh cast votes for things like I said if you're in a conference or a classroom and you want your your kids or co-workers to vote on something they can use this you can create the vote code which is a QR code they'll scan that with their device and they can easily vote anonymously or put their name to whatever and it'll go right into that uh back to the voter. We also have a file transfer we can go into and if people want to uh send pictures things like that directly to the Smartboard from their device they can also easily do that too just by scanning the QR code and everything all the documents and everything you'll see come up on the screen here so here I've scanned the QR code this is pretty much what it's going to look like I can send a picture I'll take a photo of the screen we'll say use Photo and it'll send that right to the Smartboard and as you can see the image is showing up right there and there it is works pretty well we also have a calendar option that brings up a calendar with all the to-do things close that out or move it around if you want we can also turn off the Touch overlay on the screen so right now touch is working so it your touch mov moves the screen or you can turn it off and nothing else will work on the screen when you touch it and we also have the option for a screen lock but you need to create a password and this is good if you don't want anybody to use a Smartboard when you're not around.
And as far as the build quality goes it does seem to have a pretty good build quality it's very sturdy and like I mentioned before it does have an all metal frame.

Now like I mentioned before you can also connect a microphone or a USB camera Cera that has a mic built in to the Smartboard in case you want to use it for things like teams or some Zoom calls so we'll set up our camera on the top here and then I'll just simply plug this into one of the USB C's and then we'll go into our Zoom and we'll go into new meeting start a meeting and you can see my camera here so there you can do some Zoom calls or whatever else you want and you have video and audio All In one spot. You also have the option to go into your quick settings again go back into that camera it'll display the camera here and you can take some pictures it'll also generate a QR code in case you want to share this picture with the rest of your group.

As a monitor as well through the USB type-c or you can also use the HD hm that are right on the front of the Smartboard so you don't have to worry about fishing into the back connections so here I have my MacBook Pro we have our USB type-c cable connected into the MacBook Pro I'll connect the USB type-c cable into the Smartboard and it'll automatically change to the input that I just plugged in so here as you can see this is my screen I can either have whatever I have on my MacBook mirrored onto the screen or I can actually use it as two screens like you can see here I've got a different screen on my MacBook Pro versus what's on the main screen and this can all be displayed in 4k and then when you unplug it it can go back to the Android portion of the Smartboard and you can also do the same thing with an iPhone that uses USB type-c just plug in that cable into your iPhone and it'll mirror whatever is on your iPhone as well and not only does it mirror what's on your phone screen but it also charges it up while it's doing that and if you want to charge your device using the USB ports they can output about 65 Watts.

So now let's see what these speakers actually sound like on the Smartboard I'm going to go into a YouTube video here and we'll turn up the volume to see how loud it gets in to see what it sounds like Galaxy s25 Ultra also known as the Galaxy s25 Ultra 5 gangster Alpha Omega Supreme AKA Unicron now why am I calling this phone Unicron the Supreme AI phone now if you like AI you're going to love this however if y'all to unpa event and they was talking about the Google Gemini AI did y'all notice they try to slip it in under the radar but it said free for the first 6 months I was like huh what does that mean after 6 months so you heard the speakers on this Smartboard do get pretty loud and that was only about 50 uh 75% of the way and it was super loud it was also very trebly it doesn't have a lot of uh range but because it does get loud everybody in the room is are definitely going to be able to hear what's on the screen it just not might not be you know the best sound quality possible but again you also do have the option to hook up a receiver with some speakers if you want some better sound.

And as far as picture quality goes I think the Smartboard has a great picture quality as you can see from what I'm displaying here I do have a 4K YouTube video playing and everything looks nice and sharp I also like the fact that the screen is matte so if you have a lot of uh light coming in from Windows or a bright room you're not going to get a lot of glare off the screen the screen also looks great in a darker room as well so here you can see the picture quality looks amazing in and dark environment and you can also see that some of the darker areas on the screen actually look dark instead of looking washed out as far as picture quality goes I think the Smartboard has a beautiful picture especially if you're displaying things in 4k as you can see from the videos playing here the picture looks absolutely amazing and I think it even looks a lot better in a darker environment and if we take a look at some video of the Moon you can kind of get an idea of what the contrast ratio looks like it actually looks darker to me in real life versus it being a little bit more washed out you can see how dark the black areas of the screen actually are and they're not super washed out like some other monitors now I do have the brightness up all the way on the screen so what I'm going to do now is I'm going to turn the the auto brightness on and we're going to take a look at that screen again so it's turning down the brightness I'll show you what it's at right now so as you can see it's a little bit less than halfway down on the brightness so we'll go back to another video of the moon so you can kind of see what the contrast looks like now that we've turned down some of the brightness so again looking at this Moon video I really don't see much of a difference the Darks of the screen look pretty dark there's only a very slight hint of like a gray wash out I don't know if you guys can tell from this screen here but it looks pretty dark and then if we go back to that same portion of the moon with the lights on again you can see what the contrast ratio looks like with the all the lights on here I think the picture still looks great.

So now let's try out some games that utilize the touch of the Smartboard I've got a couple of games here we've got Angry Birds and Fruit Ninja so we'll open up our Fruit Ninja game this is a great game to play especially if you have kids and you can also use all of your fingers so as you saw it's definitely not the smoothest experience but the game is playable there's still a little bit of lag but it still works and then we'll try out our Angry Birds so I'm not really sure what's going on with Angry Birds it kind of gets to the loading screen it looks like it's going to load and then it just kind of gets stuck on this screen and won't go any further so there are going to be some limitations on what you can play and applications you can actually use on the Smartboard because again it only does have 4 gigs of RAM and the type of CPU that it uses so it did take me a couple tries to actually get the Angry Birds application to load up the first time it just kind of looked like it was logging in and then it just froze and I actually had to go in and optimize the ram that the the Smartboard was using because it only has 4 gigs of RAM when you open up multiple things it uses some of the RAM and then other applications might not be able to use it so if you have an application you're using that doesn't seem to be working just go into the optimizer optimize the RAM and then try to reopen the application and it should work just like we can see here with our Angry Birds and then we also have Google Maps you can see there is a little bit of lag but for the most part it seems to run pretty good then we'll put on our satellite layer so you can see that loaded in pretty fast and we'll kind of zoom in here and not too bad either there is just a slight bit of lag but for the most part it runs pretty good so you can see once we actually get into Angry Bird's game and start playing the experience is fairly smooth it's just that in some of the menus it's a little choppy.

So now I want to test out the Smartboard using a gaming console here I have xbx series X it is at 4K and because of that 60 H refresh rate and the 8 millisecond response time we should have a pretty good gaming experience and just to show you that it is on 4K I'm going to go into TV and display and you can see the resolution is set to 4K ultra high definition let's go into some details you can't really get much uh from using the Smartboard it doesn't you know it doesn't support Dolby Vision or anything like that but at least you can still game in 4k at 60 HZ so this zombies map that we're going to play right now is brand new it just came out today and I wanted to see how well it worked so the loc I don't see any lag kind of moving back and forth I've a magic and a shlo of bullets possibly go wrong seems to be very responsive with the controller the picture looks great and because of that anti-glare screen you won't get any glare again if you have this in a a brightly lit room it also seems to shoot immediately as soon as I pull the trigger so I don't see any input lag too some say it block there and here's me without my umbrella so I didn't notice any input lag at all everything seemed to be pretty smooth so if you're going to be using this for any type of regular gaming you should have a pretty good experience now because it does have an 8 milliseconds response time I don't think it's good enough for a competition gaming board but for regular just everyday gaming you should have a great time but of course I couldn't just include the FPS test I have to also include a rasing Sim because it's also got.
No comments
Where Visions Are Amplified!
Email: support@hkmlc.com
Phone: 1-877-947-8577
Adress: ROOM_1, 16/F EMPRESS PLAZA 17-19 CHATHAM ROAD SOUTH, TSIM SHA TSUI, HK


0 comments